There may be instances when you wish to designated one of your workspace layers to be an "Outline" layer. In this case, VisiLaunch keeps two main windows open: one for the main outline image, and one for the other layer images. Displaying a floor plan, and then showing each room of a house, is one example where an Outline layer might be used: 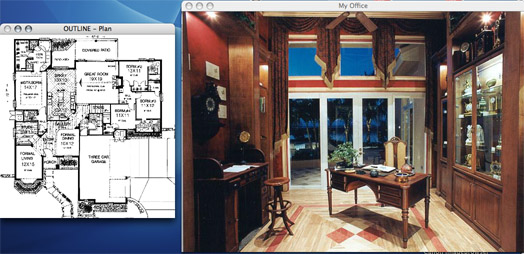 In this manner, by clicking in any "room" in the floor plan (the Outline layer), a corresponding picture would appear in the main window. Of course you could still navigate the workspace through links set in the main window. Note: You would still set all the layer links, even in the floor plan, as described before (in the Main window). For example, to create the workspace as shown above, you would: 1. Load and link all of your room pictures (into different layers). 2. Load the floor plan picture (as the last layer). 3. Make links on the floor plan picture for each pre-existing room layer. 4. Designate the floor plan layer as the Outline Layer. Here is how you designate any one layer as the Outline layer:
 Upon clicking "OK", VisiLaunch should open the designated layer in a new "OUTLINE - " window. The same image will also appear in the main window (for now). However, when you click link areas in the Outline window, you will see that this actually only loads images in the Main window. Outline layer properties are saved with your VisiLaunch database. Hence, if you designate one layer as an Outline layer, the next time you launch VisiLaunch (or manually open this database file), the Outline layer window will automatically open along with the Main window. Undesignating an Outline Layer You can undesignate an outline layer by first loading the layer in the Main Window (it may be easiest to load all the thumbnails in the Layers Window and then double click the outline layer thumbnail). Put the VisiLaunch Tool into Program mode. Click the Layer Link button in the Tool, and click the "Set" button (as described above). Leave all the boxes unchecked in the Layer Properties dialog box. Click the "OK" button. This will reset the Outline Layer property of this layer. |
||||||||||||||||

